

How to Install a Water Heater: A Homeowner’s Complete Guide
Installing a water heater is one of those home projects that looks straightforward on YouTube and turns into a weekend disaster in real life. Between gas lines, venting requirements, electrical connections, local permits, and the sheer weight of a 50-gallon tank, it’s a job where small mistakes have big consequences — flooded garages, voided warranties, carbon monoxide risks, or failed inspections that block a future home sale.
This guide walks you through what’s involved when you install a water heater, how to choose the right unit, and why most homeowners ultimately choose professional installation.
Step 1: Choose the Right Type of Water Heater
The first decision is the biggest. There are four main types of water heaters, each with trade-offs:
- Conventional Storage (Tank): Affordable upfront, simple to install, holds 30–80 gallons of pre-heated water. Best for predictable household demand.
- Tankless (On-Demand): Heats water as you use it. Endless hot water, longer lifespan, lower energy bills, but higher upfront cost and may require gas line or electrical upgrades.
- Heat Pump (Hybrid): Pulls heat from surrounding air; extremely energy-efficient. Best in warmer climates and spaces with adequate airflow.
- Solar: Uses roof-mounted panels. High upfront cost but minimal operating cost; usually paired with a backup system.
Step 2: Size the Unit Correctly
Too small and you’ll run out of hot water mid-shower. Too large and you’ll pay to heat water you never use. For tank units, sizing is based on First Hour Rating (FHR) — how much hot water the unit can deliver in a single peak hour. As a rough guide:
- 1–2 people: 30–40 gallon tank
- 2–3 people: 40–50 gallon tank
- 3–4 people: 50–60 gallon tank
- 5+ people: 60–80 gallon tank or tankless
Tankless units are sized by gallons-per-minute (GPM) flow rate based on simultaneous fixture use.
Step 3: Check Local Codes & Permits
In most jurisdictions, including Upland and the surrounding Inland Empire, water heater installation requires a permit and final inspection. Local codes dictate things like seismic strapping, drip pan requirements, expansion tank specifications, venting clearances, and TPR valve discharge routing. Skipping permits may save time but can void your homeowner’s insurance and create problems when you sell the house.
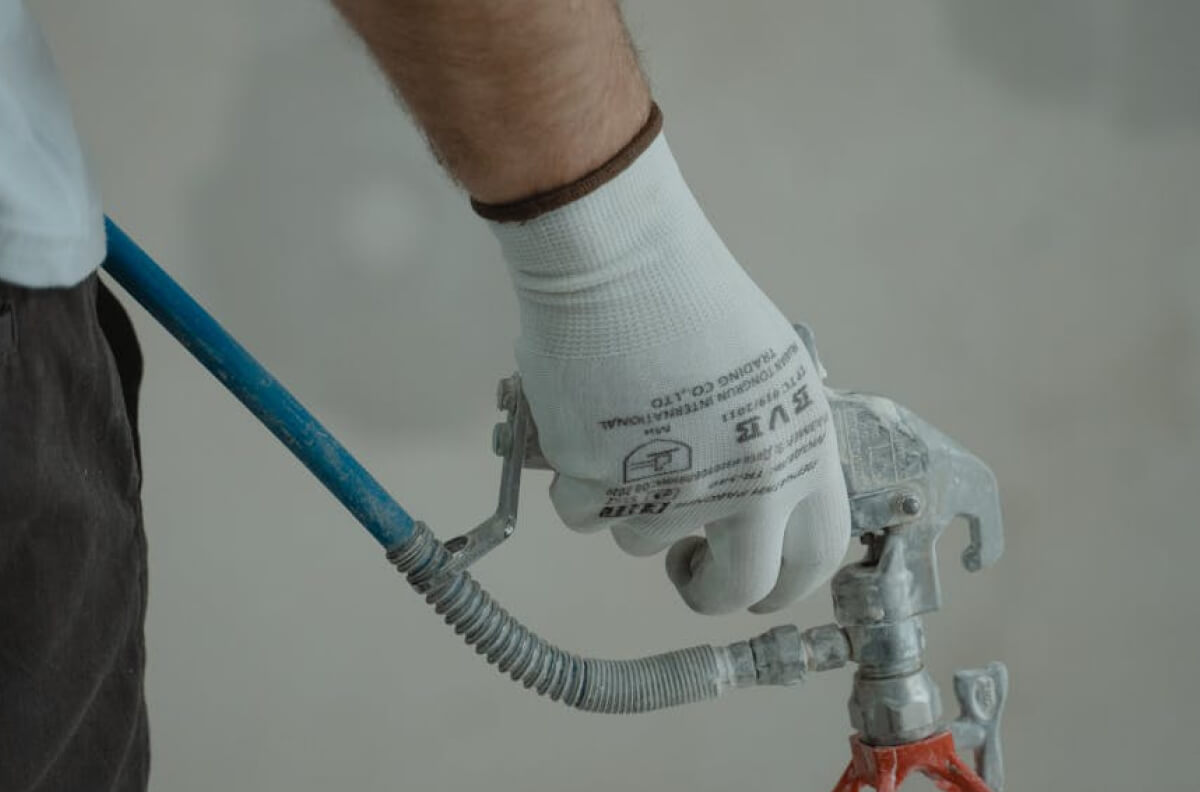
Step 4: Prepare the Installation Site
Before the new unit goes in, the area needs to be ready:
- Shut off gas or electrical supply at the source
- Shut off the cold water supply
- Drain the existing unit completely
- Disconnect water, gas, and venting connections
- Safely remove the old unit (these can weigh 150+ pounds when empty)
- Inspect the platform, drain pan, and surrounding area
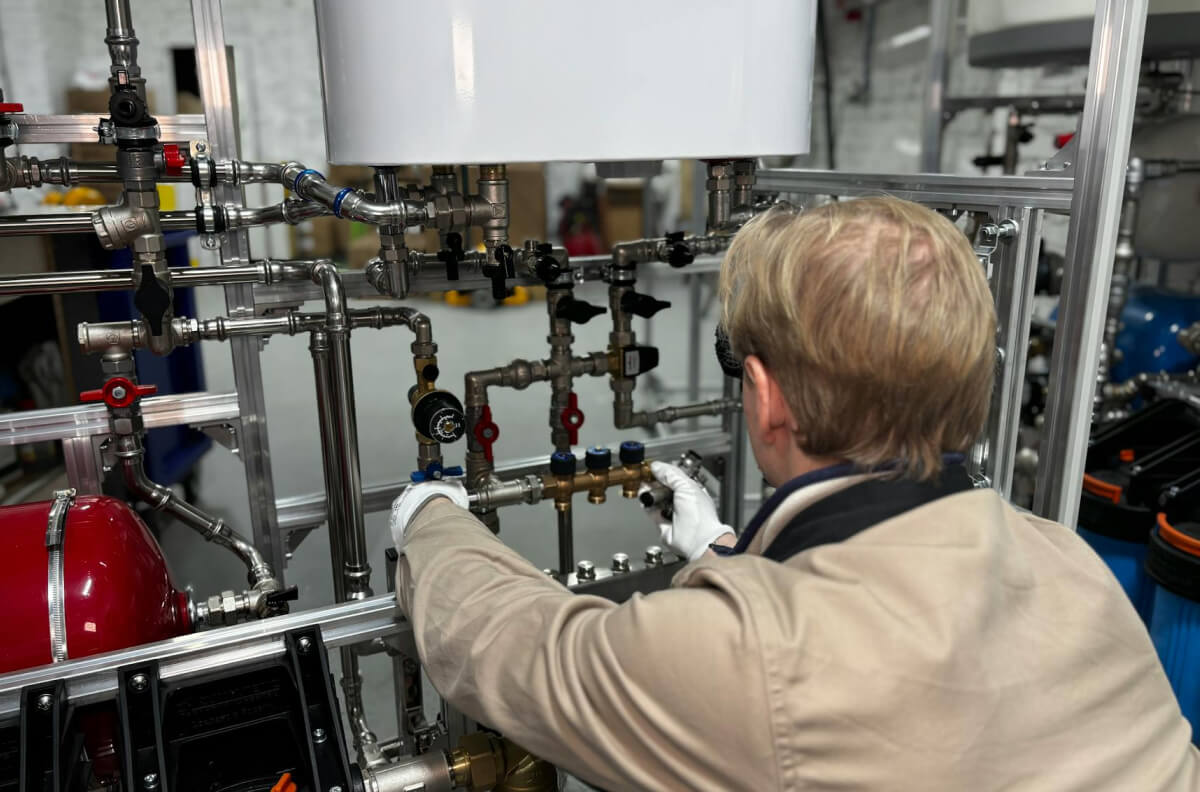
Step 5: Install the New Unit
This is where the bulk of the work happens. Done correctly, it includes:
- Positioning and leveling the new unit
- Connecting cold and hot water lines (often with new flex connectors)
- Installing or reusing the temperature and pressure relief (TPR) valve and discharge pipe
- Connecting the gas line and pressure-testing for leaks (gas units)
- Wiring electrical connections to code (electric units)
- Installing or inspecting venting (gas units) — improper venting is a top cause of carbon monoxide poisoning
- Installing seismic straps where required
- Installing an expansion tank if required by local code
Step 6: Fill, Test, and Inspect
Once everything is connected, the unit is filled (with hot water taps open to bleed air from the lines), powered on, and tested. A professional installer will check temperature output, look for leaks at every connection, verify proper venting draft on gas units, and ensure the TPR valve operates correctly. The local building inspector then signs off on the permit.
Why DIY Installation Is Risky
It’s legal in many places to install your own water heater — but legal is not the same as advisable. Common DIY mistakes include:
- Cross-threaded gas connections that leak slowly
- Improperly sized TPR discharge pipes
- Missed venting requirements that allow carbon monoxide back-drafting
- Voided manufacturer warranties (many require licensed installation)
- Failed inspections that delay home sales
And then there’s the practical problem of safely moving 150-pound tanks down stairs or out of tight closets without injury or damage.
What Professional Installation Costs
Installation costs vary based on the type and size of unit, complexity of the install, and any code upgrades required. A standard tank-to-tank swap is the most affordable; a tank-to-tankless conversion or a relocation costs more due to gas line and venting modifications. The good news: a professional install almost always includes haul-away of the old unit, full warranty registration, and code-compliant work that will pass inspection the first time.
Schedule Professional Installation
If you’re planning to install a water heater in Upland or the surrounding area, the team at Water Heater Upland is ready to help. We handle everything from unit selection and permitting to installation and final inspection — all backed by our satisfaction guarantee. Call 1-800-905-7115 or schedule online to get started with a free in-home consultation.